Microsoft introduced one of the new features in Windows Server 2012 to enable customised Access Denied Message assistance that helps requester to get the share access and request the access via error message.
Usually when
user does not have share access, the user will be prompted the below popup and
it will not guide them how to get access,

Now let
jump in to the LAB and we will implement “Access Denied Message Assistance”.
The Assistance
can be implementing in two ways, GPO or FSRM.
Now we
are going to configure it by File Server Resource Manager (FSRM).
These
labs give you some basic idea about the Access Denied Assistance, and there are
few additional features are there where you can refer them into MS Library.
By implementing
FSRM, we would be require SMTP Service, hence I have download Email Service
Software (602 LAN Suite).
My Email
Configuration

The Email
Software can also be used as Proxy and Content Filter etc. now let see the
Email Setup for my Lab.

The
Share Folder Configuration on DC1 Server.

Now
Install File Server Resource Manager on DC1 and Configure the “Access Denied Message
Assistance”

Let’s set
Custom Access Denied Assistance Message

Finally
Configure Email Setup, if user interested to access share the user can request
via Assistance.

Let’s access
share and see the error.

Opps, we
have received the error but this time the Message is not annoying, whereas it
is suggesting whom do I need to contact, let me check how “Request Assistance”
can help.
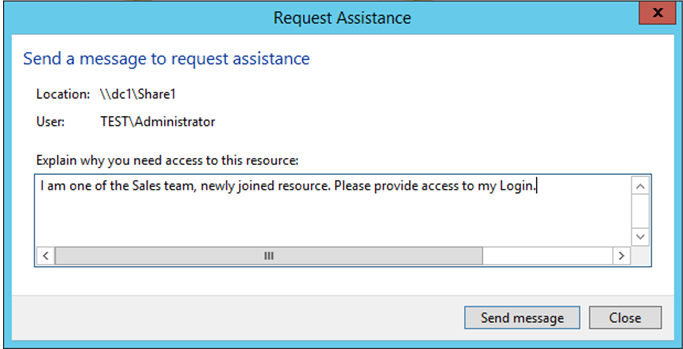
The assistance
prompted with the above form, I just filed it and send it to owner.
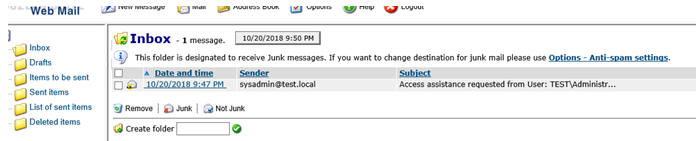
The owner
received my Request via Email their review.

The FSRM
have too many great feature, this one I feel quiet helpful for System Admins
and Users for their day to day Operations.
***** Happy
Learning *****


